

[Latest] How to set up Klaviyo
Klaviyo Initial Setup Guide
Klaviyo is a powerful email marketing tool specialized for e-commerce businesses. By properly completing the initial setup, you can leverage customer data to deliver targeted emails. This article provides a detailed explanation of the initial setup steps for Klaviyo, from account creation and domain authentication to enhance email reliability, to platform integration methods and sending test emails.
1. Account Creation
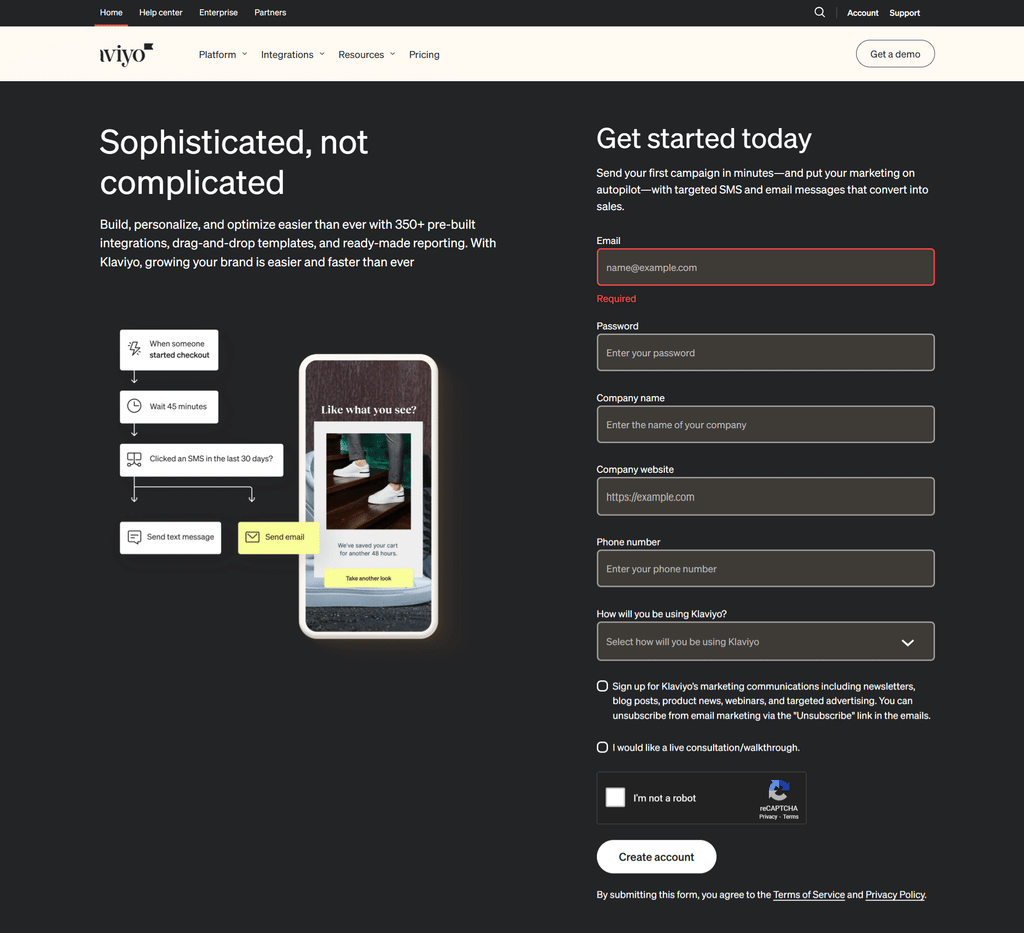
Create an account on the official Klaviyo website and enter your business information. In this step, you will set up your account information and basic business details to gain access to the Klaviyo dashboard.
■ Steps
・Visit the official Klaviyo website, click "Sign Up," and fill in the required information to create an account.
・An authentication email will be sent to your registered email address; click the link to confirm.
・Enter account information such as your business name and website URL.
2. Brand Settings
Next, set up your brand information in Klaviyo to maintain brand consistency. By setting brand colors and logos, you can ensure a unified design for your email campaigns.
■ Steps
In the Klaviyo dashboard, navigate to "Account" > "Settings" and configure the various settings.
Also, in the "Content" and "Image & Brand" sections, set your logo and brand colors. You can also select fonts that match your brand image here.
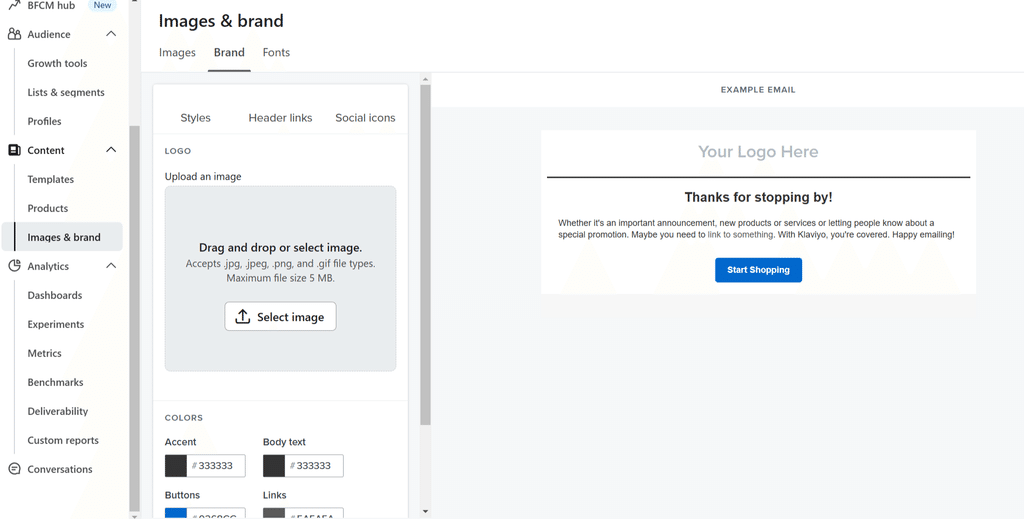
※ A unified design boosts customer trust and maximizes the effectiveness of email marketing with Klaviyo.
3. Domain Authentication (SPF/DKIM/DMARC Settings)
To ensure that emails from Klaviyo reliably reach your customers, set up SPF, DKIM, and DMARC to complete domain authentication. This setting reduces the risk of emails being classified as spam and improves deliverability.
■ Steps
In Klaviyo, navigate to "Account" > "Settings" > "Email Settings."
After adding your email domain, check the SPF and DKIM records in the "SPF/DKIM Settings" section and add them to your domain's DNS settings.
Once the DNS settings are complete, Klaviyo will automatically authenticate the domain.
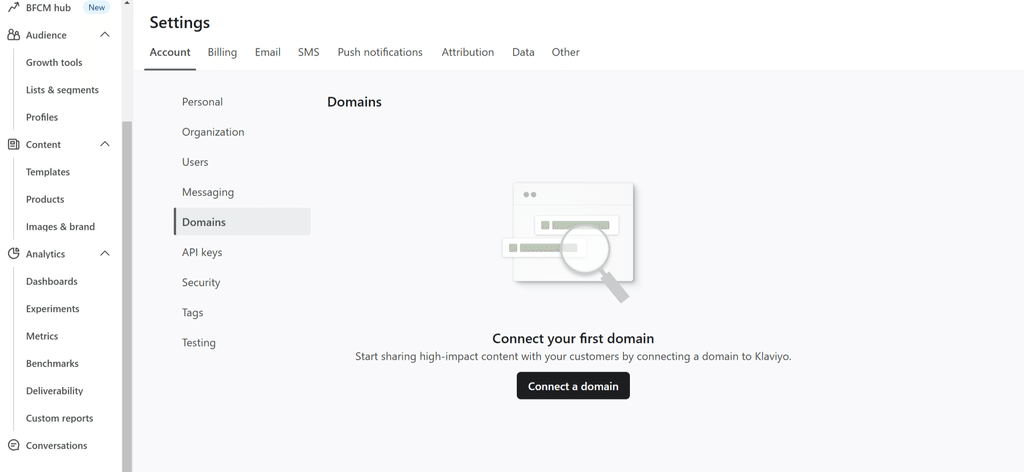
※ Completing domain authentication increases the likelihood of emails reaching customers and maximizes the effectiveness of Klaviyo's email delivery. Please feel free to contact us if you are unsure about the operation, as it varies depending on your domain management method.
4. Integration Settings (Shopify Integration)
Klaviyo's strength lies in its seamless integration with platforms like Shopify. This allows customer behavior data and purchase history to be automatically synchronized with Klaviyo, making it easy to send personalized messages.
■ Steps
In the Klaviyo dashboard, navigate to "Integrations," search for "Shopify" in the upper right, and select it.
Obtain your Shopify API key and enter it into Klaviyo to complete the integration.
Once the integration is complete, customer data will automatically sync with Klaviyo.
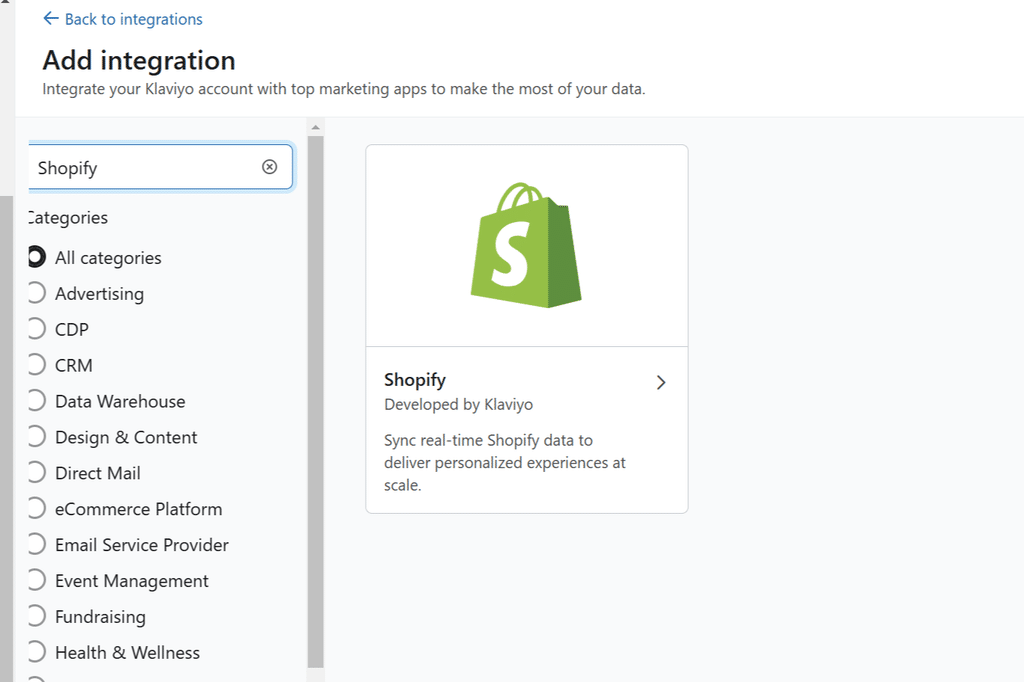
※ This integration allows for effective creation of customer behavior-based segments and retargeting emails. Furthermore, by setting up lists and segments, you can accurately deliver emails to opted-in users.
Summary
Completing Klaviyo's initial setup enables advanced email marketing leveraging customer data. Accurate settings improve deliverability and strengthen brand image. As a next step, set up personalized flows and campaign deliveries tailored to customers to maximize Klaviyo's potential.
This concludes the guide to Klaviyo's initial setup.


